Christmas Card Craft Ideas – 1
This is the first of my Christmas card craft ideas. Using simple rubber stamp techniques I will provide step by step instructions to produce this beautiful, yet easy to make Christmas card.
Basic resources for this card:
- A4 white card stock or a DL sized card with a smaller approx. 21cm x 8cm piece of white card.
- Coloured Card stock. I’m using red to match the colour of my pen. The card needs to be about the same size or slightly larger than your small piece of white card.
- Woodware ‘All about Christmas’ FRS302 Clear Stamp and Acrylic Block to fit the stamp (both currently available for purchase here).
- Black Ink Pad – I’ve used a Jet Black StazOn Pad but that’s just my preference.
- Coloured Pens – Red and Black.
- Also I recommend a good , clean work surface. I use the Woodware ‘Hot Stuff Mat’ to protect my table, especially as I’m using StazOn fast drying solvent (permanent) ink.
- A pair of scissors.
- A4 trimmer – especially useful if you haven’t already got a DL sized card.
- Double sided mounting tape.
- Red ribbon bow for decoration.
Step 1 – Cut your white card to size
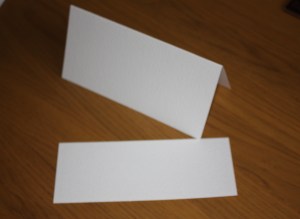
To make a DL size card cut from a piece of A4 a card measuring 21cm x 21cm and fold in half. The remainder of the card is then about the right size for your small piece.
Step 2 – Ink-up
Take the Woodware ‘All about Christmas’ stamp and position it on your clear acrylic block. Then after protecting your working area, ink-up your stamp by firmly pressing your ink pad all over the stamp. 
As noted, my preference (when not embossing an image) is to use StazOn, but my ink pad was slightly dry so I applied re-inker to the pad.
Step 3 – Stamp image
Carefully place you inked stamp over the white card and firmly press down. Ensure you evenly apply enough pressure. This is quite a large stamp and it may take some practice to get the perfect image.

Step 4 – Clean your stamp
As I’ve used StazOn I recommend the StazOn cleaner, if however you’ve used a pigment or dye-based ink pad then washing up liquid usually works for me. More information about the different types of ink pad available here.
Step 5 – Colour image
My image wasn’t as good as I wanted, so if a few of the areas need more definition, very carefully apply black pen to those areas. Then colour the letters and border with your choice of colour – I used red here, but in the past I have created both a green version and a darker, almost burgundy red one.
Step 6 – Mount image
Trim the stamped image to leave a small (approx. 2mm) border around the outer side.
Then trim a co-ordinating coloured piece of card (red in my case) to 20.5 cm x 7.5cm. Apply mounting tape to both pieces of card.
Stick the coloured card to your pre-cut and folded DL sized card as shown in the photo, then the stamped image card on the top.
Step 7 – Finishing touches
Add a ribbon bow as an embellishment – iron with straighteners if necessary.
I used a glue dot in this instance for a quick fix – but when batch making cards I would normally recommend a hot glue gun.
Sit back and admire your finished work:


